Setting up a Ruby Development environment in Vim
I love the simplicity of using Visual Studio Code for Ruby development, but my true love still lies with Neovim for development. The complexity of configuring Vim/Neovim has kept me away from the environment for some time, but now with the advent of coc.vim and solargraph, setting up a ruby development environment with the power of VS Code has become extremely simple.
Pre-requisites⌗
A few things to note before we get started. coc.vim does require a few things for it to function.
- NodeJS and Yarn must be installed. Feel free to install using your favorite version manager (like
asdf), package manager, homebrew, or directly from the site:
curl -sL install-node.now.sh/lts | sh curl --compressed -o- -L https://yarnpkg.com/install.sh | bash
- Vim users:
- Need to be on at least Vim 8.1 or newer
- Need the npm package
vim-node-rpcinstalled
- Install the
solargraphgem:gem install solargraph - Add the
yardgem to yourGemfiledevelopment group and runbundle install.
Setting up Vim⌗
Now we install the plugins into Vim/Neovim. Add the following to your .vimrc or init.vim:
call plug#begin("~/.config/nvim/plugged")

Plug "neoclide/coc.nvim", {"do": { -> coc#util#install()}} " Language Server support
Plug "vim-ruby/vim-ruby" " For Facts, Ruby functions, and custom providers

call plug#end()
Save the file and quit, then run vim +PlugInstall
Note: For users using a plugin manager other than Vim-Plug, such as Pathogen, you will need to run coc#util#install() from Vim NORMAL mode after the plugin has been installed.
Next, we need to install the coc-solargraph extension for coc.vim. Open vim back up and run CocInstall coc-solargraph from NORMAL mode. (You may want to install coc-snippets and coc-lists for some extra functionality, but it’s not needed.)
Finally, we need to generate gem documentation from your project directory. Enter into one of your Ruby project directories and run bundle exec yard gems. This assumes you already have gem "yard" added to your Gemfile and have run bundle install.
Once that is complete, you’re all set to start developing. The auto-complete should automatically start working.
Examples⌗
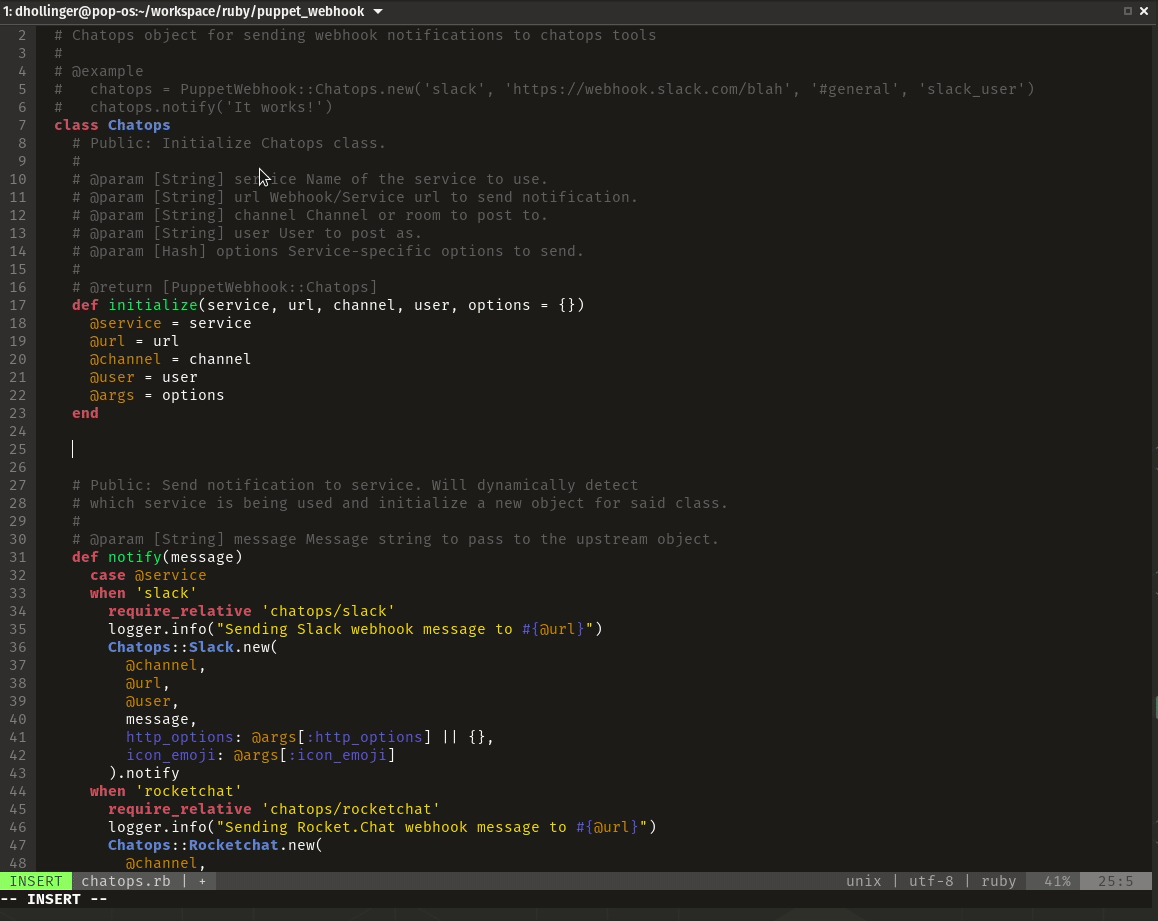
Autocompletion:
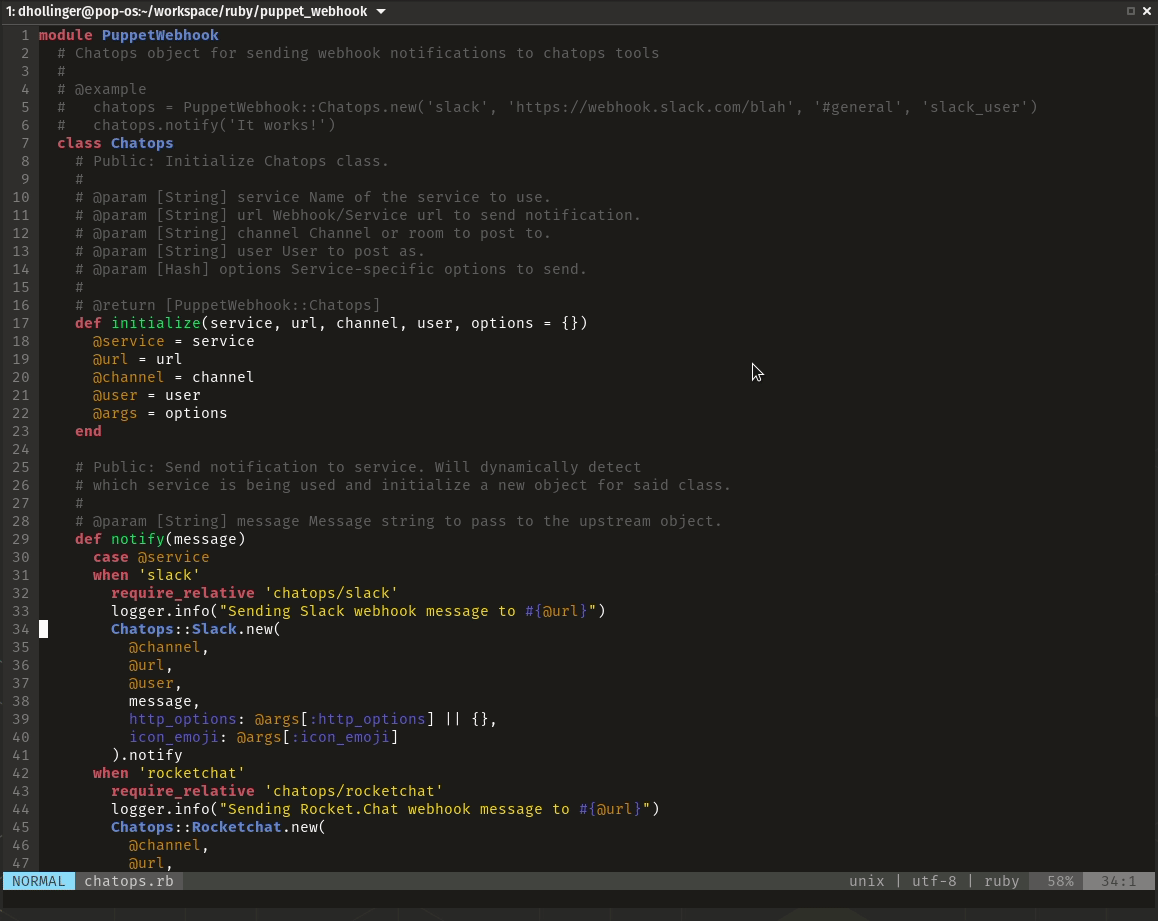
Jump to definition:
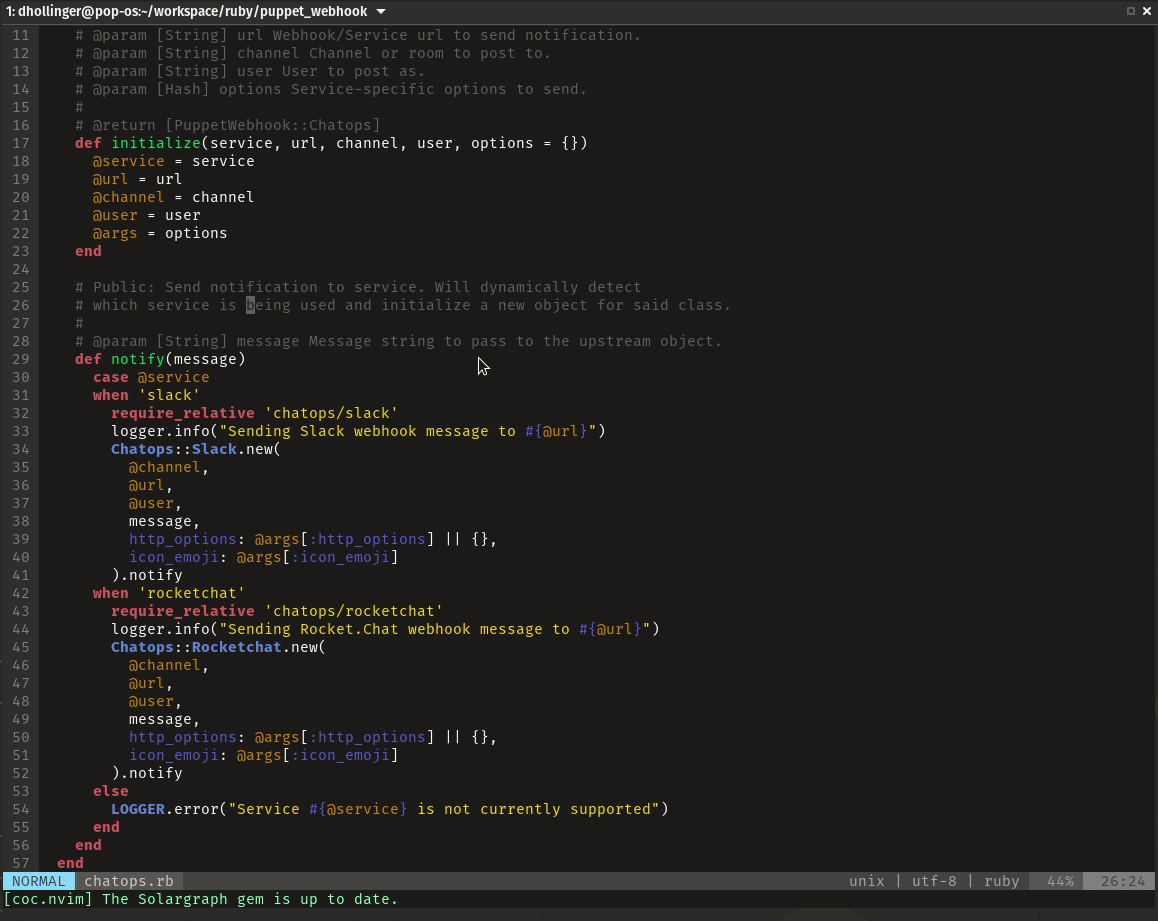
CocList:
Additional Notes⌗
You will probably want to map some function calls and commands to hot keys in vim. A few useful ones would be:
call CocActionAsync("jumpDefinition")– Jump to method, class, module definition.CocList– Open a Coc List. More information here: CocList- For autoloading frameworks, like Rails, you will have to utilize the
requirearray in.solargraph.yml. This is a Solargraph issue and applies to both Vim and VS Code. See solargraph issue #87